By Marcus A. Hale • Published June 9, 2026 • Last updated: June 9, 2026
Starting digital drawing at home requires less equipment than most beginners think. You do not need a $2000 setup, a dedicated studio, or professional training. You need a reliable device, free software, and a consistent place to practice.
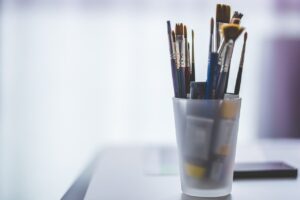
I started in my bedroom with a $40 Huion tablet, a five-year-old laptop, and Krita. My desk was a folding table from the kitchen. My chair was uncomfortable. My lighting was a desk lamp from a hardware store. I created my first paid commission in that setup. The tools were basic. The commitment was not.
This guide shows you how to start digital drawing at home with minimal investment and maximum progress.
Choose Your Input Device: Tablet, iPad, or Mouse
The input device is your most important purchase. It is how you interact with the software. A mouse is possible but frustrating. A drawing tablet is ideal. An iPad is excellent if you already own one.
Drawing tablet (screenless): Connects to your computer. You draw on the tablet while looking at your monitor. Takes 1-2 weeks to adapt. Costs $40-100 for beginners. I used a Wacom Intuos Small for two years and still recommend it as the safest first purchase.
Drawing tablet (with display): You draw directly on the screen. More intuitive but more expensive. Entry-level options like the XP-Pen Artist 12 cost $200-250. I upgraded to a display tablet after my income justified it, not before.
iPad with Apple Pencil: All-in-one device. No computer needed. Procreate is $13. The iPad Air with Apple Pencil costs $600-700 total. This is the most portable and beginner-friendly option if the budget allows.
Mouse: Possible for vector art or pixel art. Nearly impossible for painting or sketching. I do not recommend starting with a mouse unless you have no other option.
Pick Software That Matches Your Budget and Goals
Free software is enough for beginners. Paid software offers convenience and integration, but it does not replace practice.
- Krita (free): Professional painting tools, animation, comics. Available on Windows, macOS, Linux. This is what I started with and still use for personal projects.
- Autodesk Sketchbook (free): Minimal interface, fast, intuitive. Perfect for beginners who feel overwhelmed by complex software.
- Procreate ($13, iPad only): The best mobile painting app. Intuitive, powerful, and affordable. Worth buying an iPad for if your budget allows.
- Photoshop (subscription): Industry standard but expensive. I subscribed only after landing commercial clients who required PSD files.
Start with one free app. Learn it deeply. Switching software every month slows your progress more than any missing feature.
Set Up Your Workspace for Comfort and Consistency
Your workspace does not need to be fancy. It needs to be consistent. A dedicated spot where you draw at the same time each day builds habit faster than any tool.
Minimum setup:
- A flat surface at elbow height. Kitchen table works. Folding table works. Desk is ideal but not required.
- Your tablet or iPad positioned so your arm rests naturally. Avoid reaching or hunching.
- Light that does not glare on your screen. A desk lamp angled away from the monitor is sufficient.
- A chair where your feet touch the floor and your back is supported. I used a dining chair for a year. It was fine.
What I added later: An adjustable monitor arm, a wrist rest for my tablet, and a small plant that made the space feel like mine. These upgrades came after I had established the habit, not before.
Establish a Daily Practice Routine
Consistency matters more than duration. Twenty minutes daily beats three hours once a week. Your brain builds muscle memory through repetition, not intensity.
My beginner routine:
- 5 minutes: Warm-up lines, circles, and ellipses on a blank canvas.
- 10 minutes: Draw one simple object from reference. A mug, a shoe, a piece of fruit.
- 5 minutes: Review your drawing. Compare it to the reference. Write one thing to improve tomorrow.
This routine takes 20 minutes. It is boring. It is also the fastest path to improvement I have found. After three months of this routine, my lines were cleaner, my proportions were more accurate, and my confidence was higher than after a year of random drawing.
Find References and Learning Resources
References are essential. Drawing from imagination is a skill that comes after drawing from observation. Beginners who skip references draw symbols instead of reality.
- Reference photos: Pexels, Unsplash, and Pixabay offer free, high-quality photos for practice.
- Tutorials: YouTube channels like Proko, Marco Bucci, and Ethan Becker offer free, structured instruction.
- Communities: Reddit r/learnart and Discord servers provide feedback from other artists. Post your work. Accept critique. Ignore trolls.
I learned more from posting my work in r/learnart and receiving honest feedback than from any paid course. The community will spot problems you cannot see yourself.
Track Your Progress and Stay Patient
Keep every drawing. Create a folder named by month. Review monthly. The progress is invisible day-to-day but obvious month-to-month. This visibility keeps motivation alive when improvement feels slow.
Expect frustration. Your first digital drawings will look worse than your paper sketches. The tablet feels foreign. The software is confusing. This is normal. I hated digital drawing for my first month. By month three, I preferred it. By month six, I could not imagine going back.
Related: Best Drawing Tablets for Beginners: Complete Buying Guide
Marcus A. Hale is a self-taught digital illustrator based in Brazil with 6+ years of hands-on experience. He founded Drawinglics to document honest, tested advice for beginners.

Marcus Hale is a self-taught digital illustrator and art enthusiast with 6+ years of hands-on experience with Procreate, Photoshop, and Krita. He started sketching in school notebooks and transitioned to digital art in 2019, testing dozens of tablets, software, and techniques along the way. At Drawinglics, he shares what he learned through practice — no promises of natural talent, just real tests, documented mistakes, and processes that actually work for beginners starting from scratch. When he is not testing new brushes or setting up tablets.